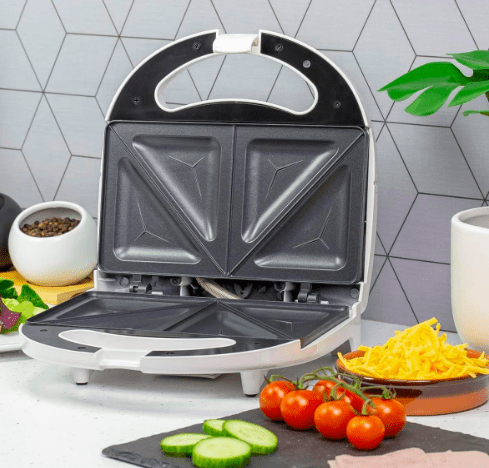
Toastie makers have earned their spot as a staple in many kitchens, prized for their ability to quickly churn out delicious, crispy toasted sandwiches. However, keeping them in tip-top shape requires regular maintenance. Without proper cleaning, toastie makers can become a breeding ground for crumbs and grease, which can compromise both the taste of your sandwiches and the hygiene of your appliance.
In this detailed guide, we’ll walk you through five straightforward steps how to clean your toastie maker effectively. We’ll also introduce some innovative cleaning products that can make the process easier and more efficient.

Step 1: Unplug and Cool Down
Safety is crucial when dealing with electrical appliances. Before you start cleaning, make sure to unplug your toastie maker. This step is crucial to prevent any electrical hazards or accidental burns. After unplugging, allow the appliance to cool down completely. Cleaning a hot toastie maker is not only risky but can also lead to burns or damage the appliance.
Step 2: Remove Excess Crumbs with Hot Sponge Scrub
Once your toastie maker has cooled, it’s time to tackle the crumbs and residue. Start by using a hot sponge with a non-stick-safe scrub side. Gently press the sponge into the grooves of the cooking plates to dislodge any trapped crumbs or bits of food. The heat from the sponge helps to loosen residues, while the non-stick scrub side ensures that you don’t scratch the plates. This method is both gentle and effective, making it an ideal first step in your cleaning routine.
Step 3: Wash Removable Plates with Baking Soda Paste Scrub
For more persistent grime or burnt-on residue, a baking soda paste can work wonders. To create this paste, mix baking soda with hot water until it forms a thick consistency. Apply this paste to the removable plates of your toastie maker. The baking soda acts as a mild abrasive, breaking down grease and food particles without damaging the non-stick surface. Let the paste sit for a few minutes before scrubbing it off with a sponge. Rinse the plates thoroughly with warm water and dry them completely before reassembling your toastie maker.
Step 4: Use the Chopstick Cloth Trick for Precision Cleaning
Sometimes, crumbs and residue can find their way into hard-to-reach spots. To address these stubborn areas, try the chopstick cloth trick. Take a wooden chopstick and wrap the wide end with a damp cloth. Gently insert the wrapped end into the grooves and corners of the toastie maker. The chopstick allows you to reach into narrow spaces without scratching the surface. This method is particularly useful for cleaning around hinges or deep crevices where debris may accumulate.
Step 5: Steam Cleaning Method (With Caution!) for Deep Cleaning
If conventional methods don’t fully remove the residue, the steam cleaning method can be a game-changer. First, set your toastie maker to its lowest setting and keep the lid open. Place a soaked cloth on the cooking plates, allowing the steam to build up. The steam helps to loosen stubborn residue, making it easier to wipe away with a sponge or damp cloth. Be very cautious with this method to avoid burns or damage. Ensure that the toastie maker is completely cool before attempting to clean it.
Step 6: Polish the Exterior with Surface Cleaner
The final step in your cleaning routine is to address the exterior of your toastie maker. Use a kitchen-safe surface cleaner, such as Oven Pride Deep Cleaner, to polish the outside. Wipe down all surfaces, including the hinge, frame, and handle. This step helps to remove any remaining oil spray, crumbs, or fingerprints, leaving your appliance looking as good as new.
Step 7: Invest in Non-Stick Coated Plates for Easy Cleaning
To simplify future cleaning and make maintenance easier, consider investing in non-stick coated plates. These specially designed plates prevent food from sticking, reducing the need for rigorous scrubbing. Non-stick plates are easier to clean and help maintain the performance of your toastie maker. By upgrading to these plates, you’ll save time and effort while ensuring your appliance remains in excellent condition.
Bonus Tips for Enhanced Cleaning and Maintenance
To further enhance how to clean a toastie maker, you can also consider using specialized non-stick sprays designed for kitchen appliances. These sprays can help maintain the non-stick quality of your plates, making future cleaning even easier. Additionally, regular maintenance such as wiping down your toastie maker after each use can prevent the buildup of grease and crumbs, reducing the frequency of deep cleaning.
Conclusion
Maintaining your toastie maker is key to enjoying perfectly toasted sandwiches while ensuring the appliance remains hygienic and in good working condition. By following these steps—unplugging and cooling down, using a hot sponge, applying a baking soda paste, employing the chopstick cloth trick, and utilizing steam cleaning when necessary—you’ll keep your toastie maker in optimal shape. Additionally, polishing the exterior and considering non-stick coated plates will further enhance your cleaning routine.
If you’re also in the market for a new toastie maker or want to explore top-rated models, check out Dr. Cooker’s previous blog, “5 Best Sandwich Makers: Find Your Ideal Match Among Leading Brands.” This guide offers detailed reviews and recommendations to help you find the perfect toastie maker for your needs. You’ll find insights into various brands and models, making it easier to choose one that fits your preferences and budget.
With these tips and the right products, you’ll streamline your cleaning process and keep your toastie maker ready for your next delicious sandwich. For more kitchen cleaning tips and product recommendations, be sure to check out our detailed articles and guides.
Happy cleaning!


